
I have a Mac Mini M1 and I believe this is the greatest hardware I ever owned, it's cheap, quite, fast, runs on Mac OS and needs very little electricity. The consequence is that I let it powered on all-day long, everyday.
Wouldn't be nice to use it as a server?
The traditional way
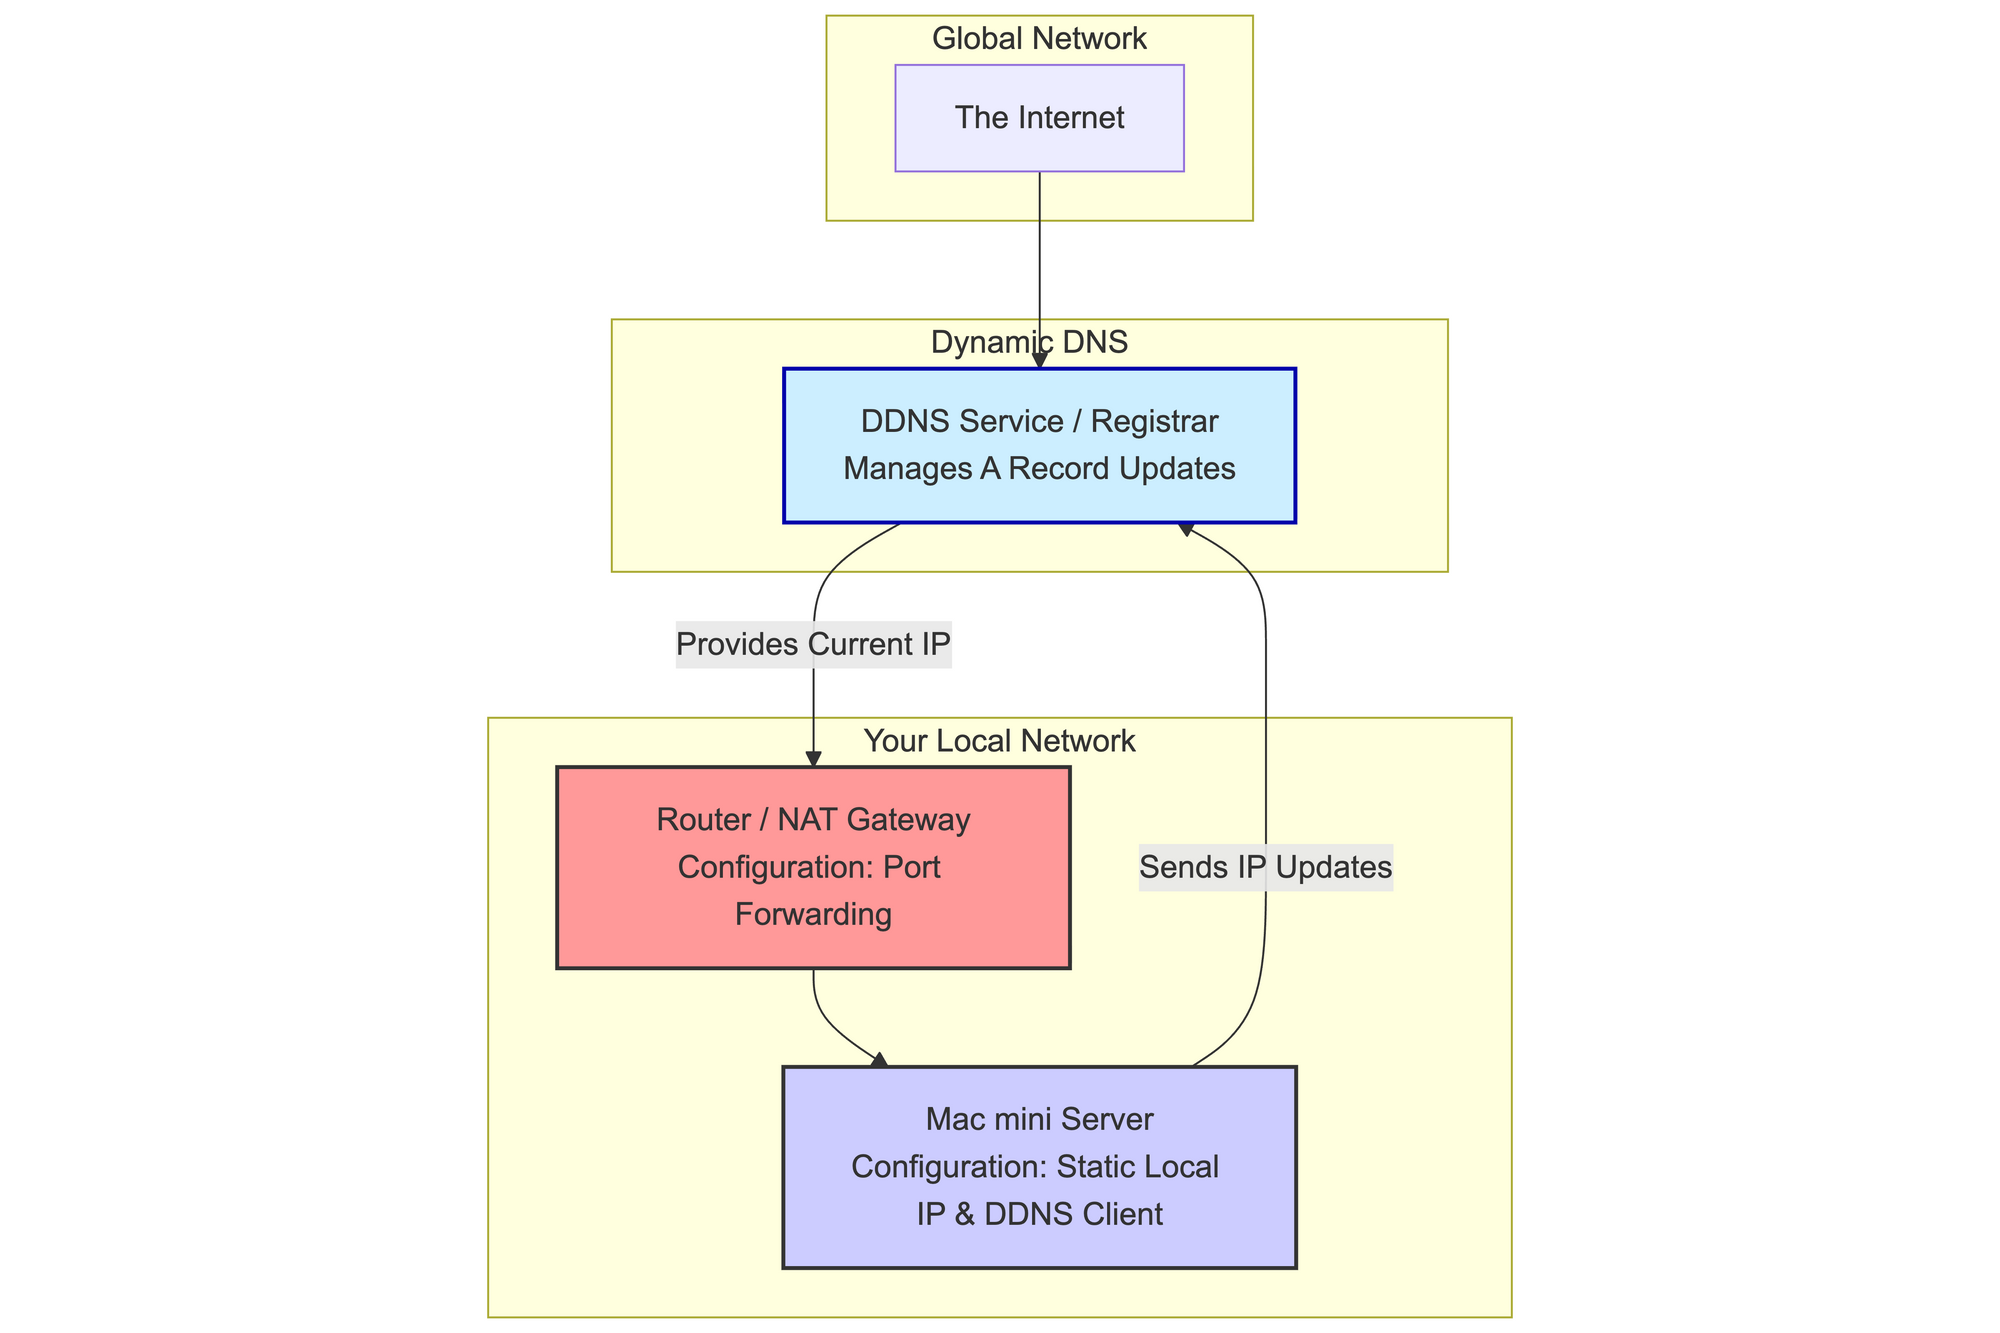
The way that I know to do self hosting would be to have a public IP provided by the ISP. Something like this scheme:


The traditional self-hosting scheme requires acquiring a Static Public IP Address from your ISP and configuring a DNS A-Record to point your domain name to it. On your local network, you must then set your Mac mini to a Static Local IP and configure the router for Port Forwarding to redirect incoming public traffic to that specific local address.
My internet connection is... complicated
As explained in a previous blog post, my internet connection is a DIY 5G router so I cannot get a static IP.
There are solutions to that like a DDNS Client. That looks like the following:

Using the DDNS architecture means I'm trading one problem (a dynamic IP) for three new headaches I'd rather avoid.
While linking my custom domain is probably doable, the necessary configuration steps are complex and time-consuming (and maybe DDNS vendor dependent) . I choose to skip all that effort.
I refuse to manually configure Port Forwarding rules on my router; managing that red box is an unnecessary complication.
Furthermore, I'm unwilling to take on the administrative load of setting up and maintaining HTTPS certificates on the Mac mini. The path of least resistance requires a solution that completely abstracts away the router, the dynamic IP, and the SSL setup.
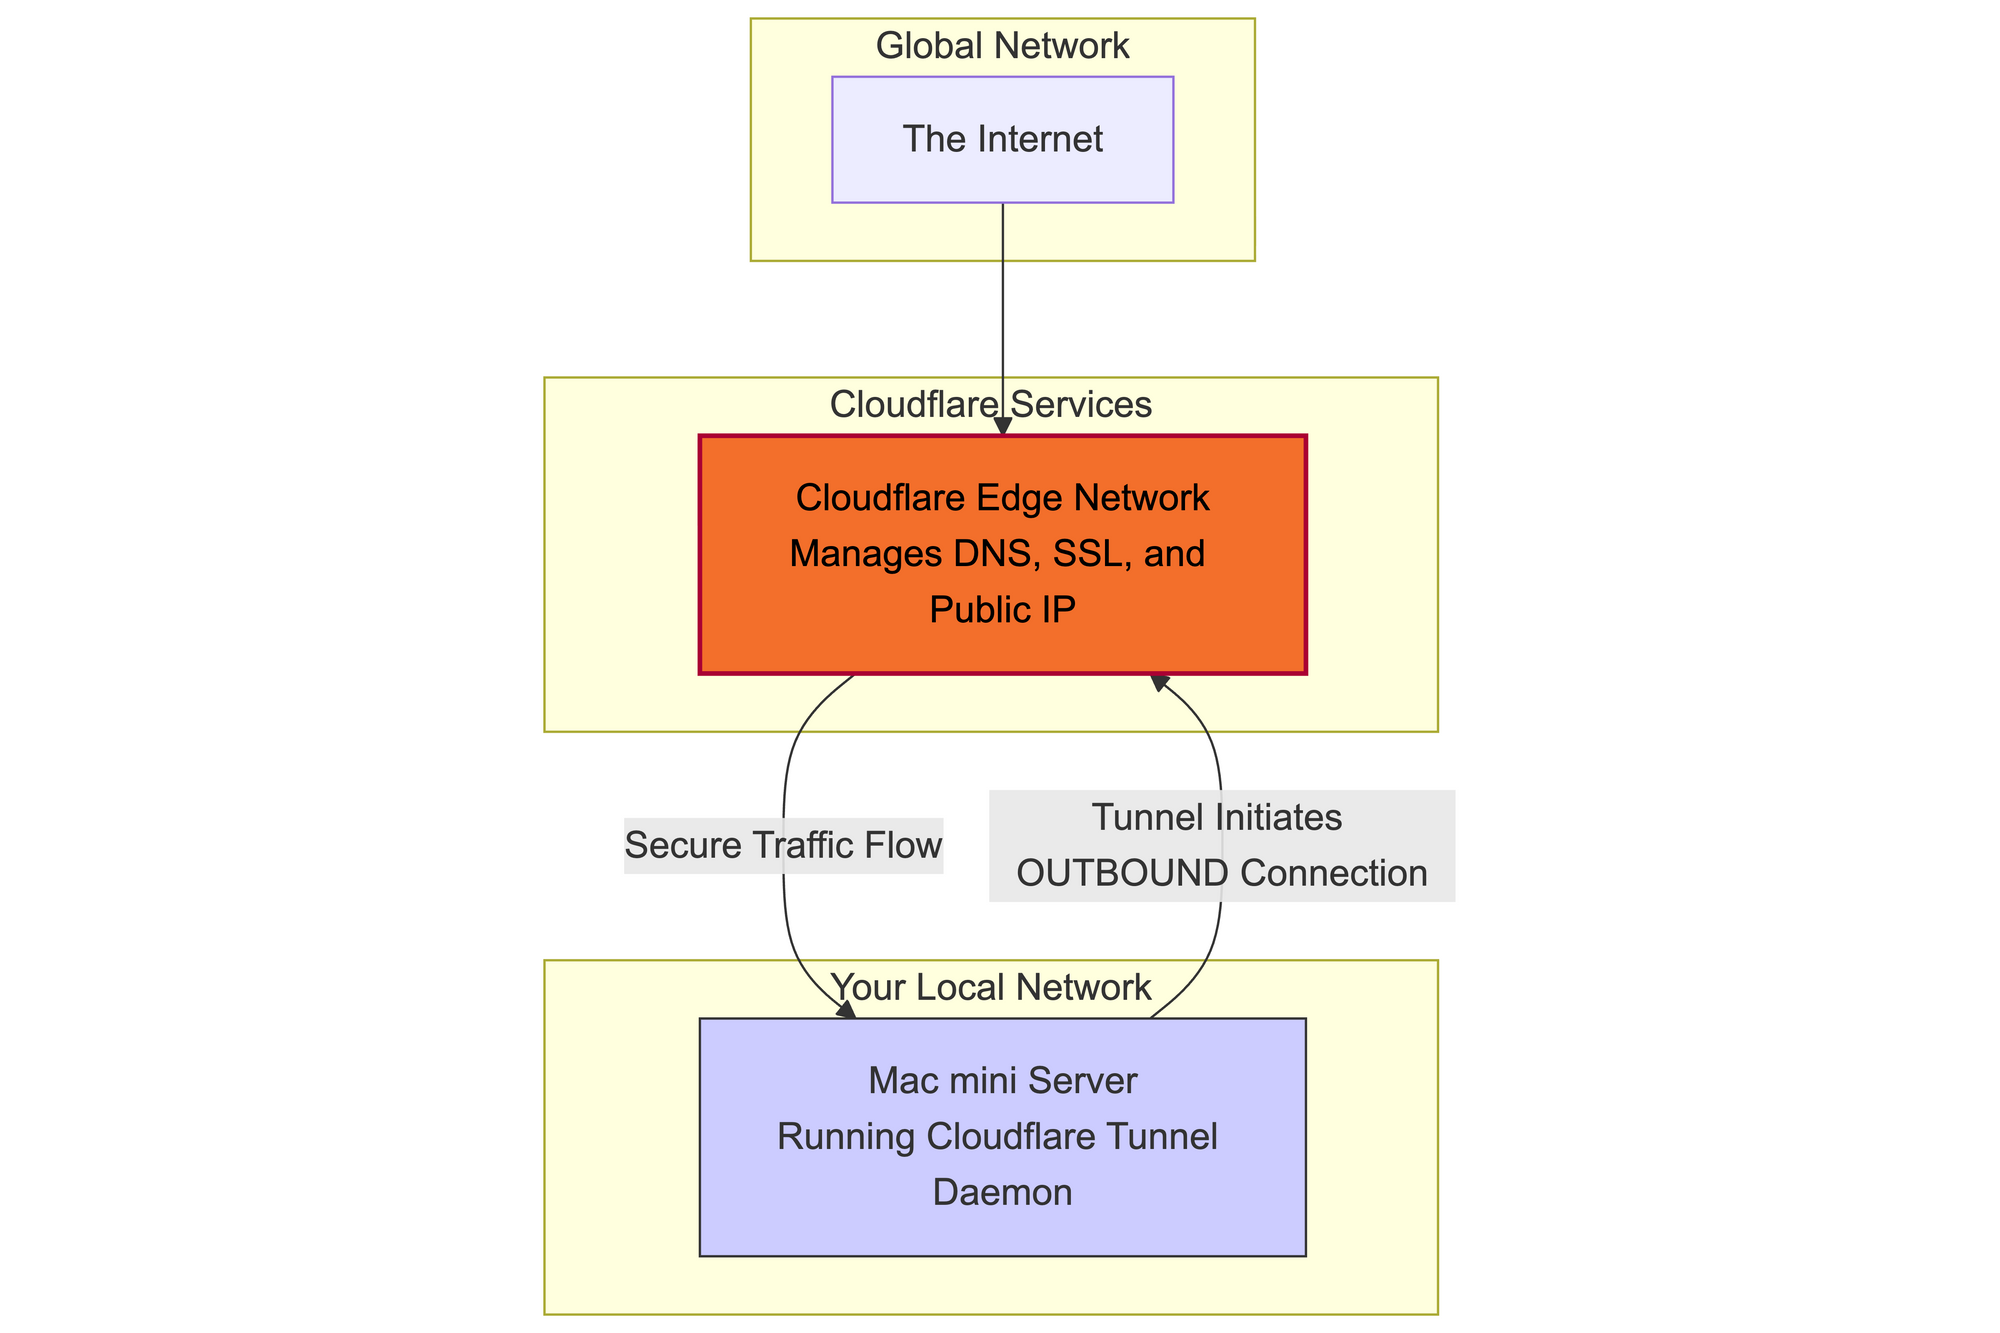
Cloudflare Tunnel for the win!
It seems that Cloudflare offers it all! For free! It works with any machine on any OS (not just Mac Mini).
I'll guide you through the setup of Cloudflare Tunnel. Great stuff!
Add the Domain to Cloudflare
Adding a domain to Cloudflare on the free plan requires you to add a TLD to Cloudflare, I didn't manage to add a subdomain only.
Either buy a domain on Cloudflare directly or buy a domain on your registrar and set the NS like the following. Cloudflare instructions


Create a tunnel
- Download cloudflared
- Login
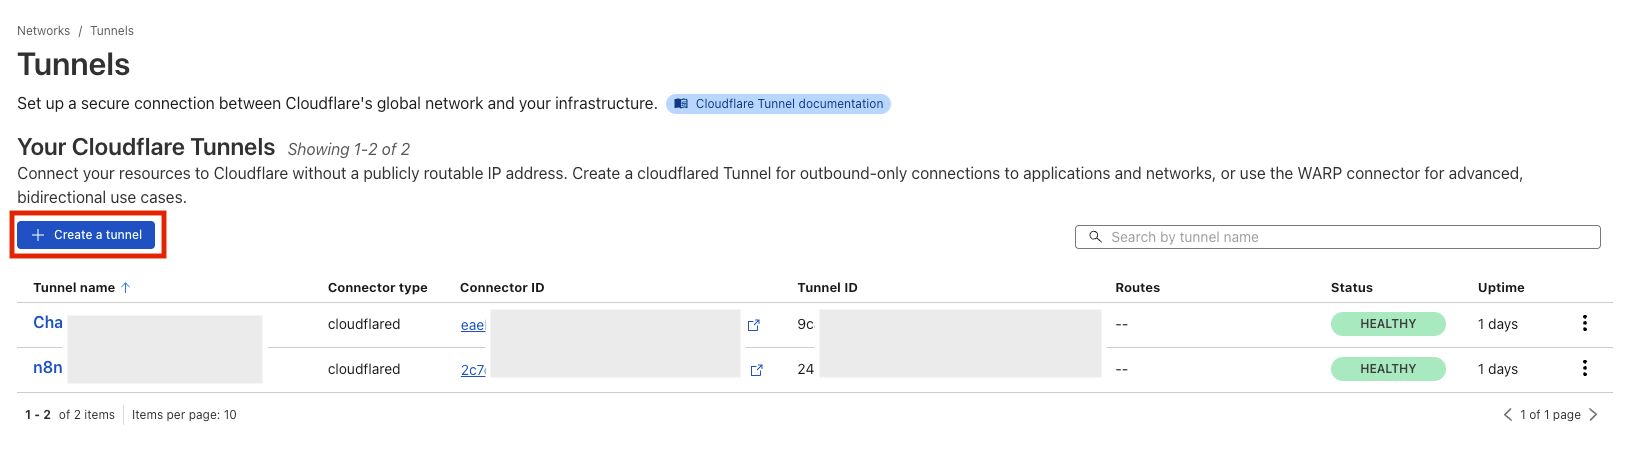
cloudflared loginand select the zone with the domain that you created previously - Networks > Tunnel > Create a tunnel
- Type cloudflared > Name it > Copy Command
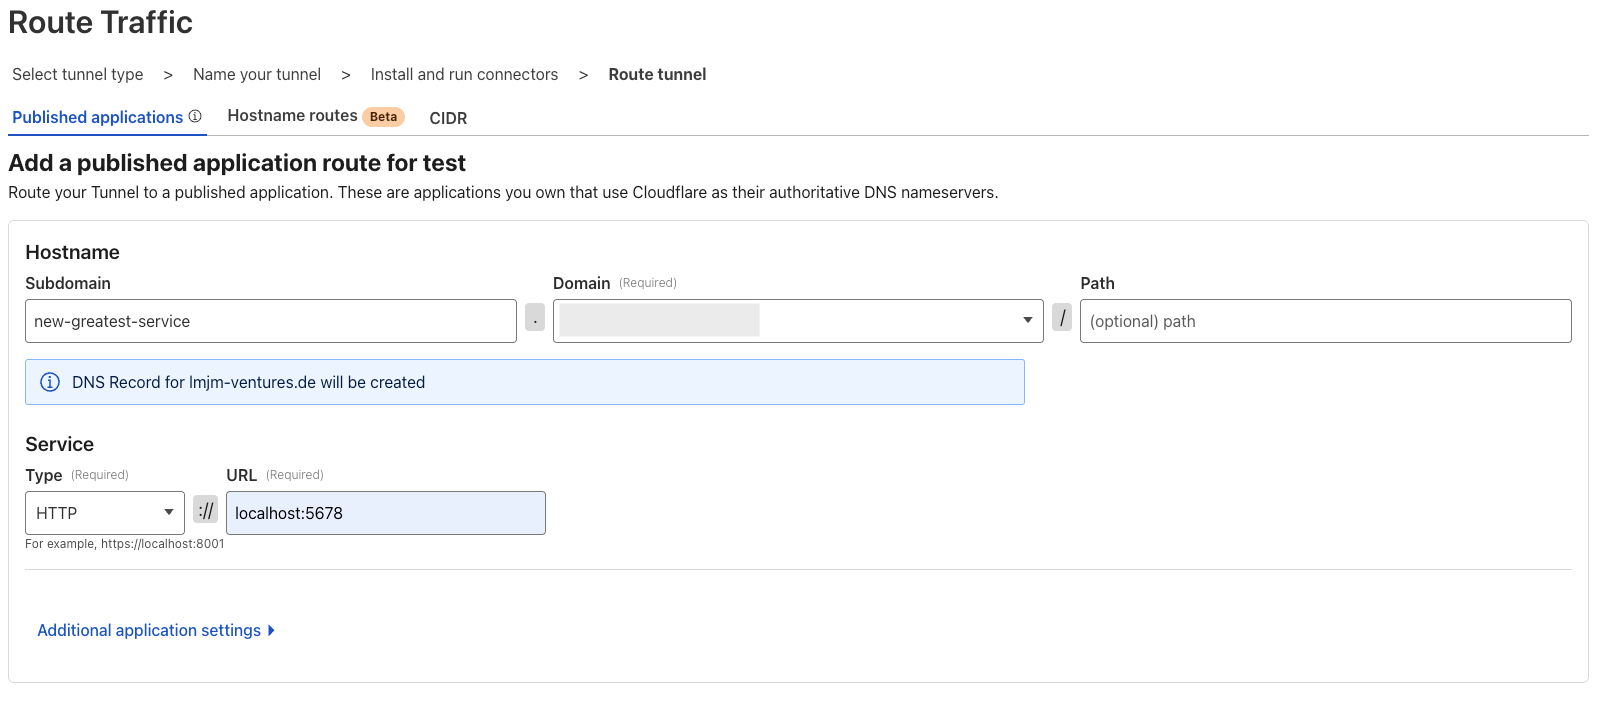
cloudflared tunnel run --token eyJhI.... - Next step route it properly. Set the name of the subdomain/path and the port on your machine
- Paste the command in your terminal and access the route you set. You are online!!


Conclusion and feedback after 1 month
I scripted my service and the Cloudflare Tunnel to launch together, giving me zero downtime (for a month - despite ISP IP change) and instantly eliminating the pain of Port Forwarding and managing my own SSL certificates. The included DDoS protection is a win as well.
It's a pragmatic exchange: as a hobbyist, I get a tiny piece of their compute/network infrastructure for free, and in return, I become a Cloudflare advocate, recommending and implementing Cloudflare solutions at work.
It's smart marketing, and it works. Well done Cloudflare.