
Many lightweight, useful applications, like the fantastic project changedetection.io, are designed for simplicity and lack built-in authentication. This is fine if running purely locally, but as soon as you expose them to the Internet (for instance via Cloudflare Tunnel), you let everyone access your service!
This is where Nginx Proxy Manager earns its keep within the Docker container ecosystem. Nginx Proxy Manager allows you to easily add a layer of Basic HTTP Authentication before the request ever reaches the vulnerable container, securing access in minutes, all without modifying the original application image.
Create a docker compose
When running a service, you first use Docker to create a single container from an image. However, complex applications, like running your application alongside Nginx Proxy Manager, require coordination between multiple containers.
This is where Docker Compose comes in. Compose lets you define your entire application stack: all services, networks, and volumes in a single, readable docker-compose.yml file. You use one simple command, docker compose up, to start and manage everything at once, automatically setting up a private network so your containers can talk to each other reliably. Compose makes deploying these interdependent services manageable.
Example with change-detection.io
services:
  changedetection:
    image: ghcr.io/dgtlmoon/changedetection.io
    container_name: changedetection
    hostname: changedetection
    volumes:
      - <myuser>/changedetection-data:/datastore
    environment:
      - PLAYWRIGHT_DRIVER_URL=ws://browser-sockpuppet-chrome:3000
    restart: unless-stopped
    depends_on:
      browser-sockpuppet-chrome:
        condition: service_started
    networks:
      - my-proxy-network

  browser-sockpuppet-chrome:
    hostname: browser-sockpuppet-chrome
    image: dgtlmoon/sockpuppetbrowser:latest
    cap_add:
      - SYS_ADMIN
    networks:
      - my-proxy-network

  nginx-proxy-manager:
    image: 'jc21/nginx-proxy-manager:latest'
    container_name: nginx-proxy-manager
    restart: unless-stopped
    ports:
      # --- CHANGED FOR TUNNEL ---
      # Expose the proxy's HTTP port (80) on your local machine's port 1805.
      - '1805:80'
      # This is still needed to access the admin panel locally.
      - '8181:81'
    volumes:
      - ./npm-data:/data
      - ./letsencrypt:/etc/letsencrypt
    networks:
      - my-proxy-network

networks:
  my-proxy-network:
This might be a bit cumbersome to read but it creates the following infra:

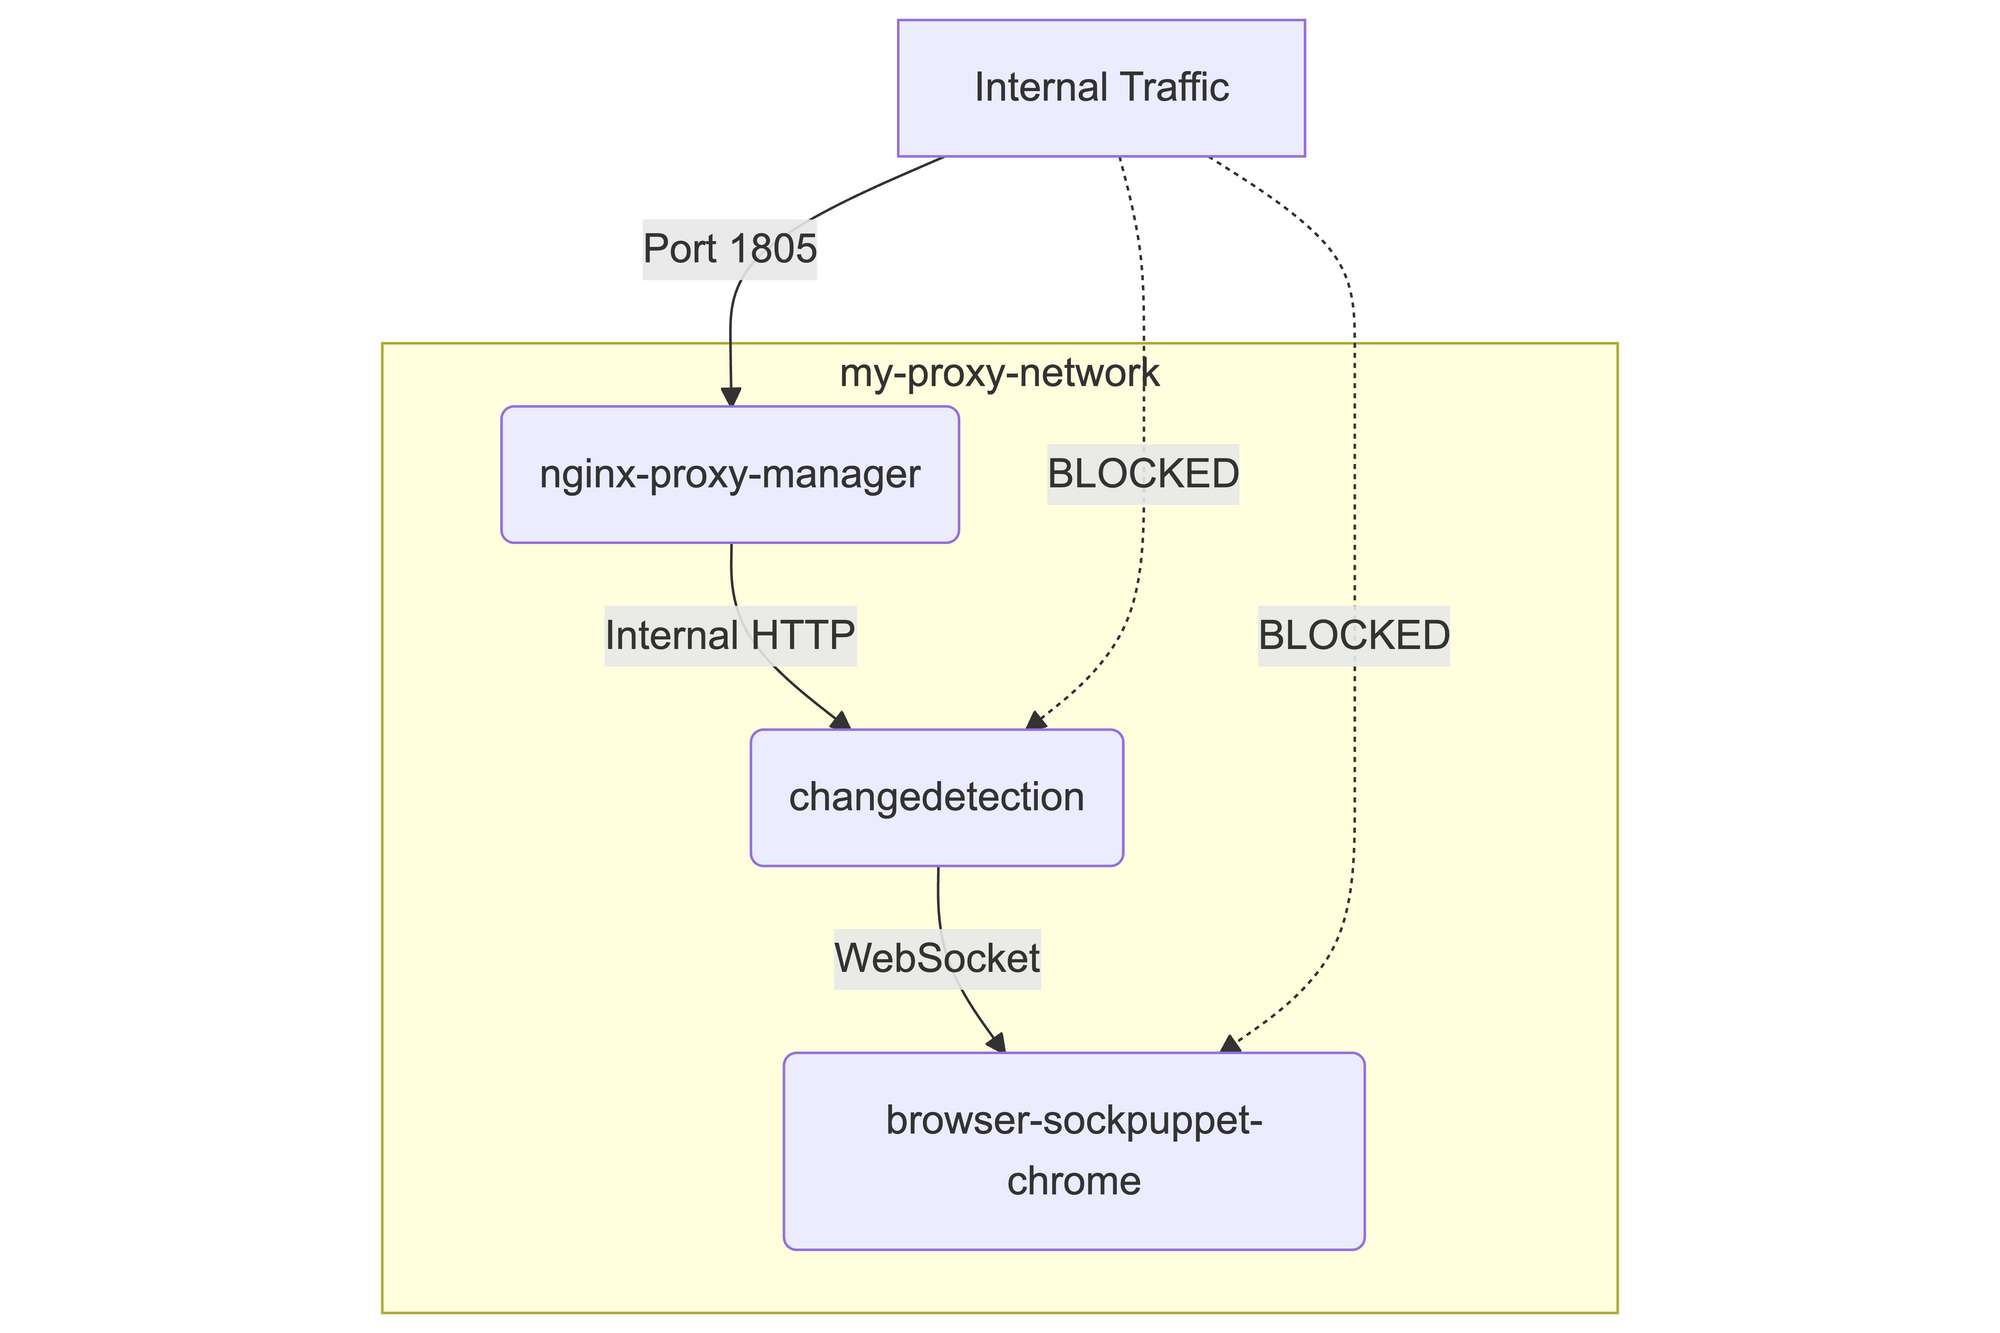
As you can see, it forces the whole traffic to go through Nginx Proxy Manager and to be secured.
Let's now have a look at the Nginx Proxy Manager interface (in this implementation it is available at http://localhost:8181/):

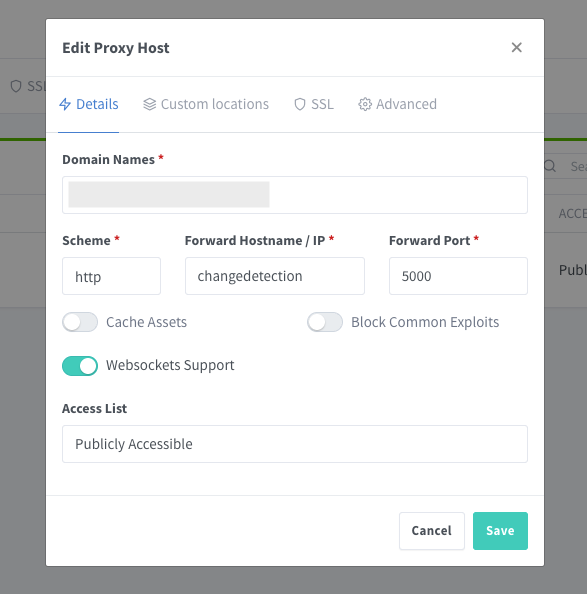

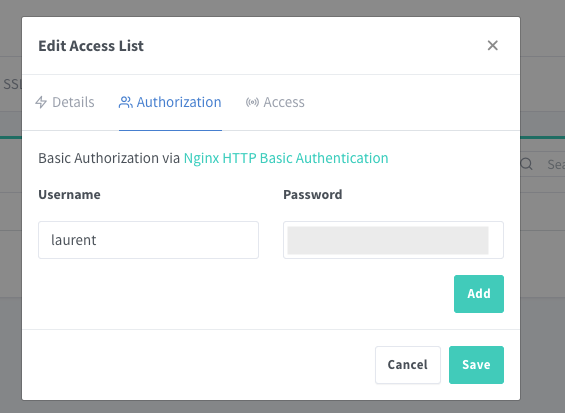
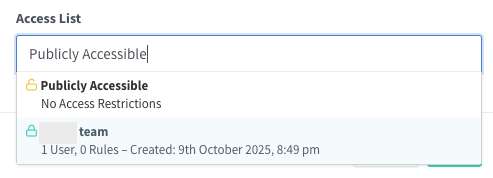
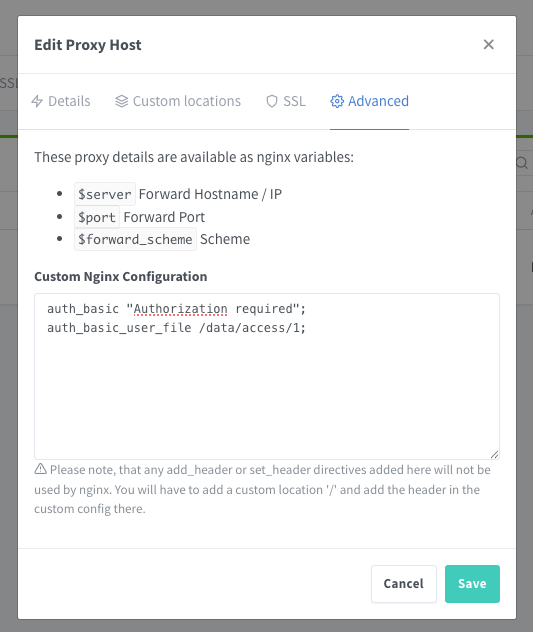
I would recommend to first create an access list for all your users. Then, you can create a proxy host that will redirect the traffic coming from the host of your choice (a custom domain or localhost depending on your use case) to the docker instance that you want to protect.
Known issue: I had an issue with the combination of the access list and the proxy host and I had to set it up via the advanced tab.


Now with Cloudflare Tunnels!
Authentication works locally, but the next step is to expose it online.

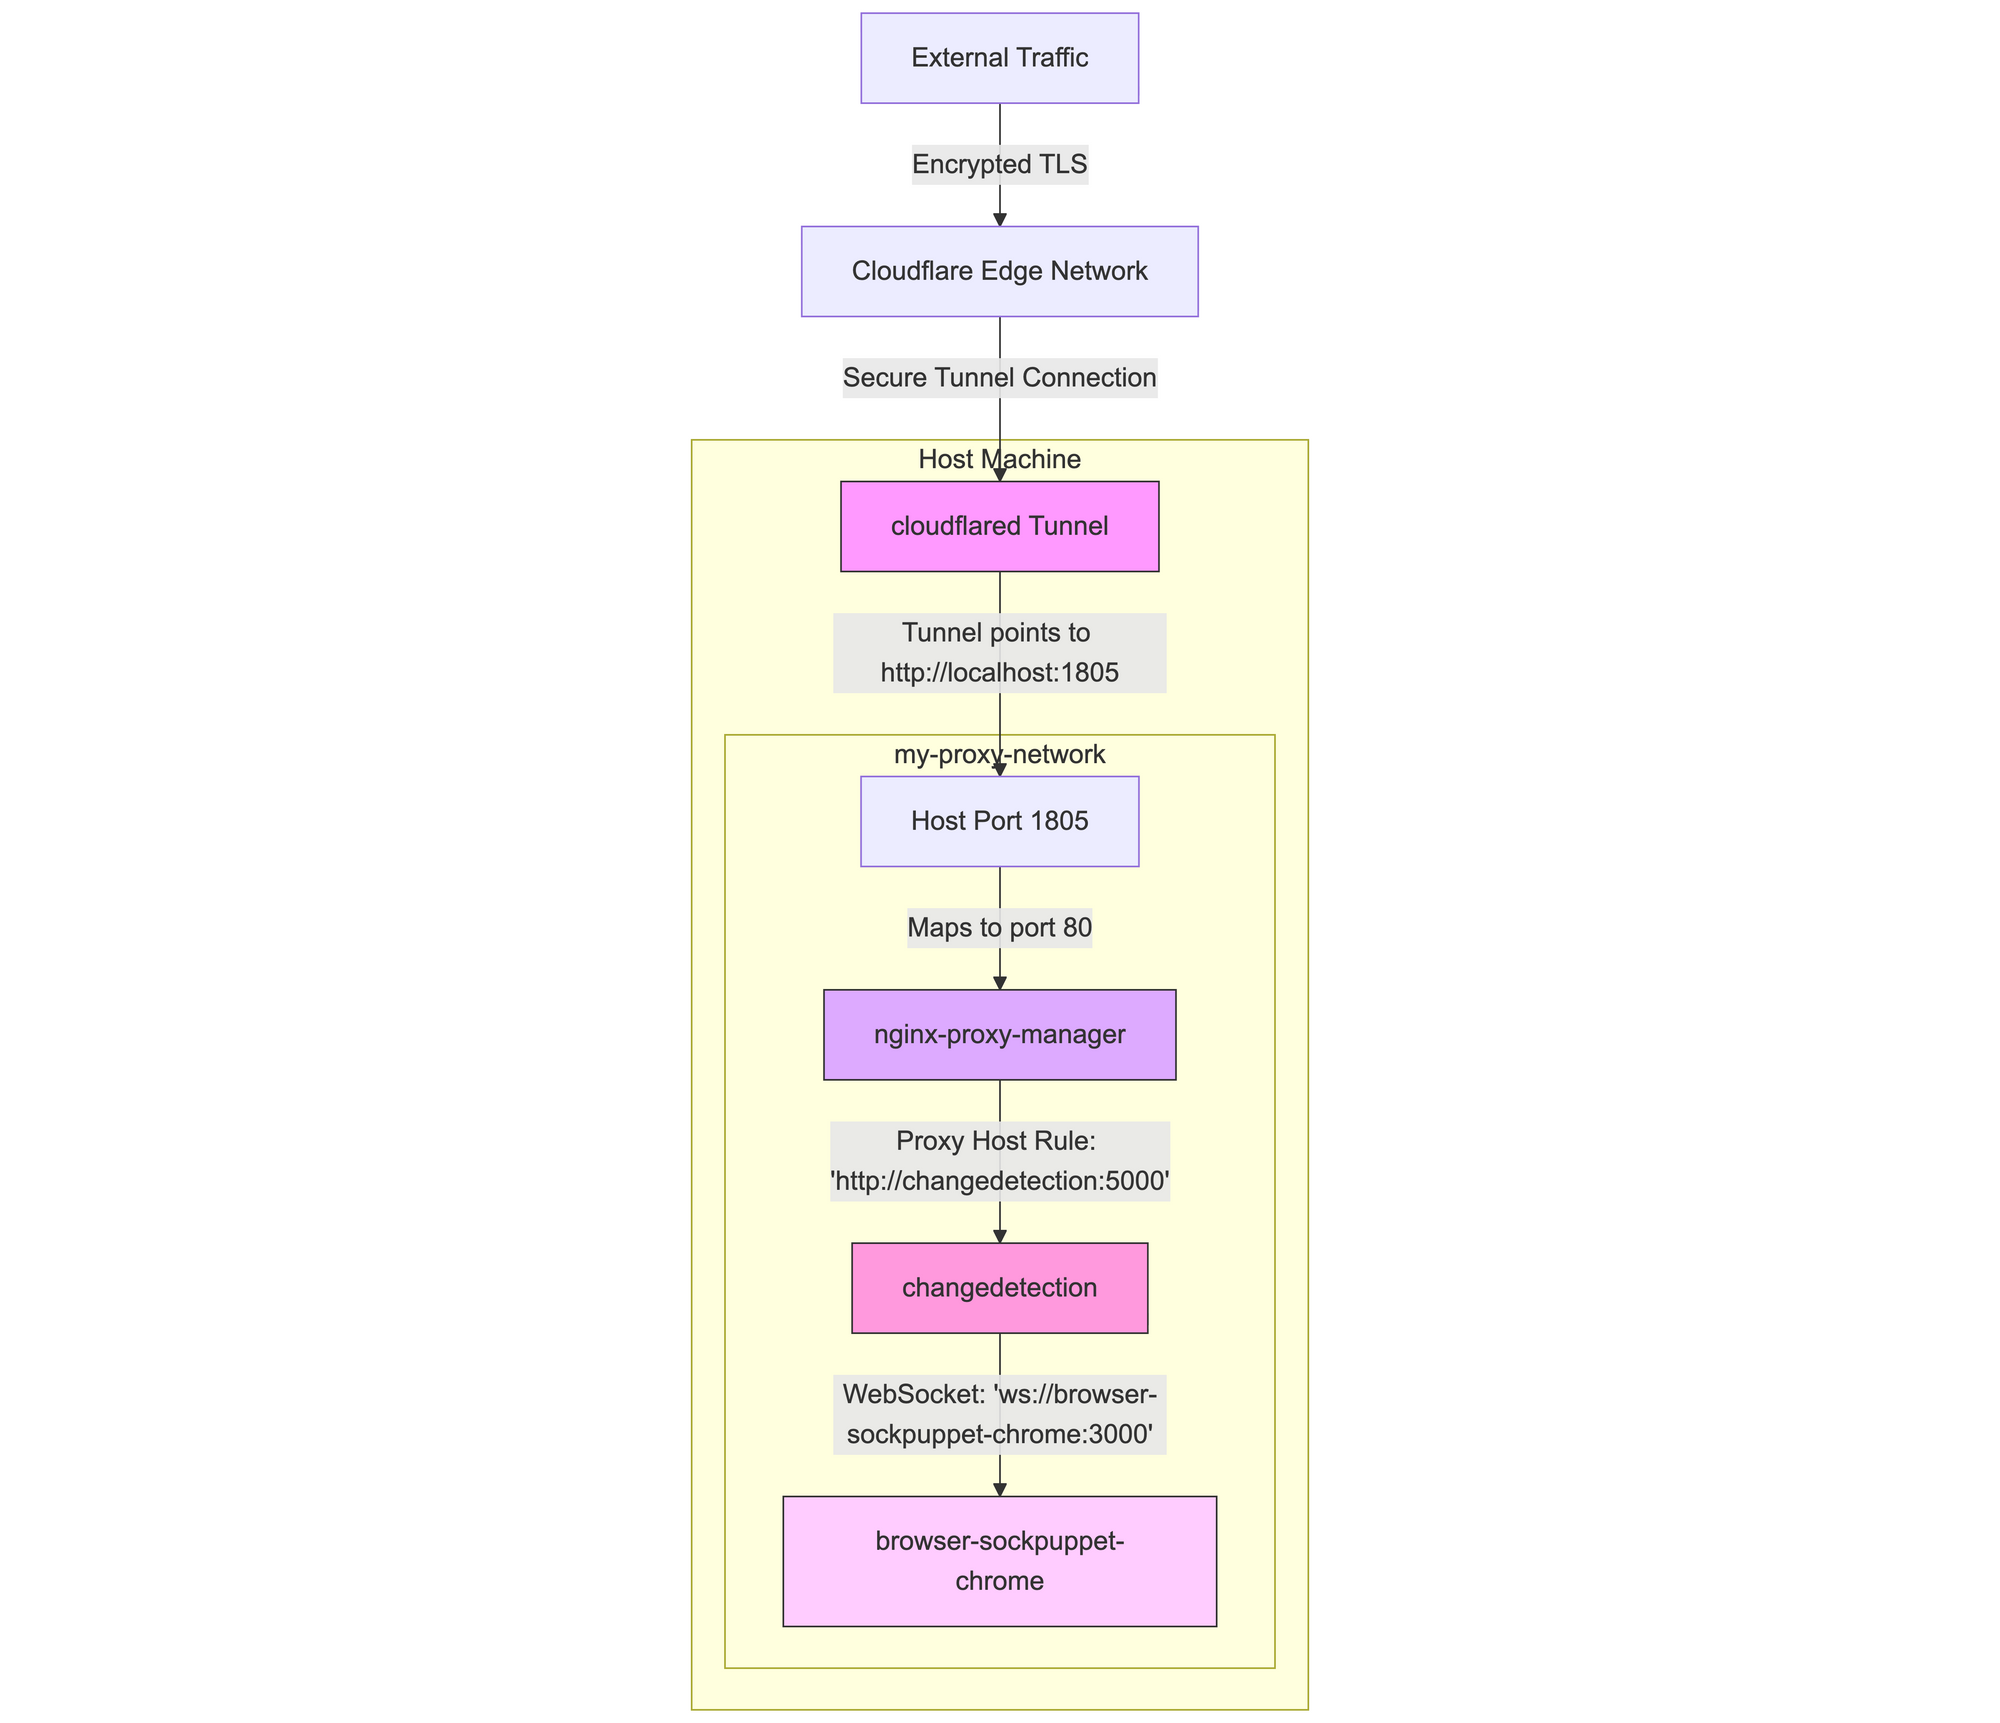
To get online, start your Cloudflare tunnel and configure it to target the host port you've mapped to Nginx Proxy Manager's internal port 80, which for me is port 1805.
Then, inside the Nginx Proxy Manager UI, create or edit your proxy host, setting the "Domain Names" field to your public domain (e.g., your-domain.com). This field directly controls the NGINX server_name directive.
Now, when you try to connect to your service from the outside, it should ask you for a username and password.